
After a request I've tried to set up a tutorial
on how to finger knit a garland that can be used for decoration,
as a headband, a necklace, a scarf or
whatever else you can think of.
(I'm sorry for the crappy photos but it was late at night,
with no proper lighting.
Plus, ignore my fingers that are filled with glue.
I was trying some scrapbooking layouts
and I was a bit messy).
Supplies needed:
bulky yarn & your hands


Directions:
To start, tie a loose knot at the end of your yarn and loop it around your pointer finger.


Start at your pointer finger and weave it in and out of your fingers until you get to your last, little one.


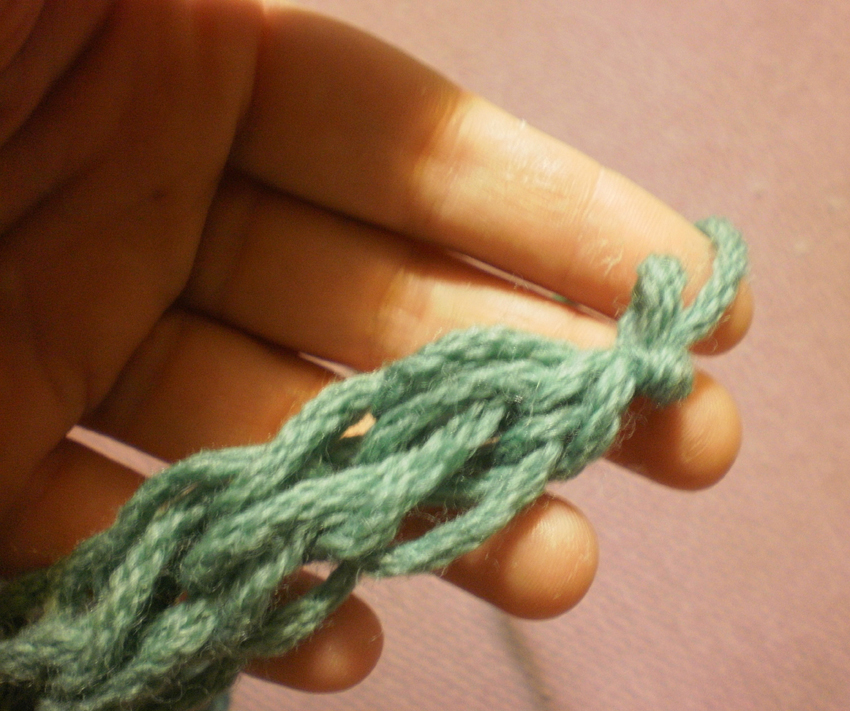
Loop your yarn around the front of your last finger, and weave it back to your pointer.


Repeat these two steps until you have two loops on each of your fingers


And now prepare for the tricky part!
With your other hand take the bottom loop
and pull it up and over the top loop on your fingers
and let it slide to the back of your hand.

Got it? Wasn't that difficult, right?
Continue with the first two steps,
weaving the yarn through your fingers
until you have two loops, again pull the bottom loop
over the top loop.
Now if you look at the back of your hand,
it should look like this


Not looking too hopeful just yet, huh?
Don't worry about it, just make sure to
pull the tail of the yarn every now and then
to make it tight and even things out.
Keep repeating steps one and two until your headband is the length you want it to be.


Be sure to loosen your loops around your fingers so you can slide them out easily.
When you are satisfied with the length of your finger knit, cut the yarn leaving
about 5-6" of extra yarn (that's 13-15cm).

about 5-6" of extra yarn (that's 13-15cm).

Take the tail of that piece and pull it through all of the finger loops. Sorry, but I didn't take a good photo of that step. You can either loosen up your finger loops enough so that you can thread the yarn through or you can carefully take your fingers out of the loops leaving and then pull the yarn through.
This way you are going to tie off the loops.

You can make an extra knot if you want to secure everything in place and... VOILA!
Your garland is ready!
 Feel free to turn it into whatever you want.
A necklace, a headband or a bracelet like I did.


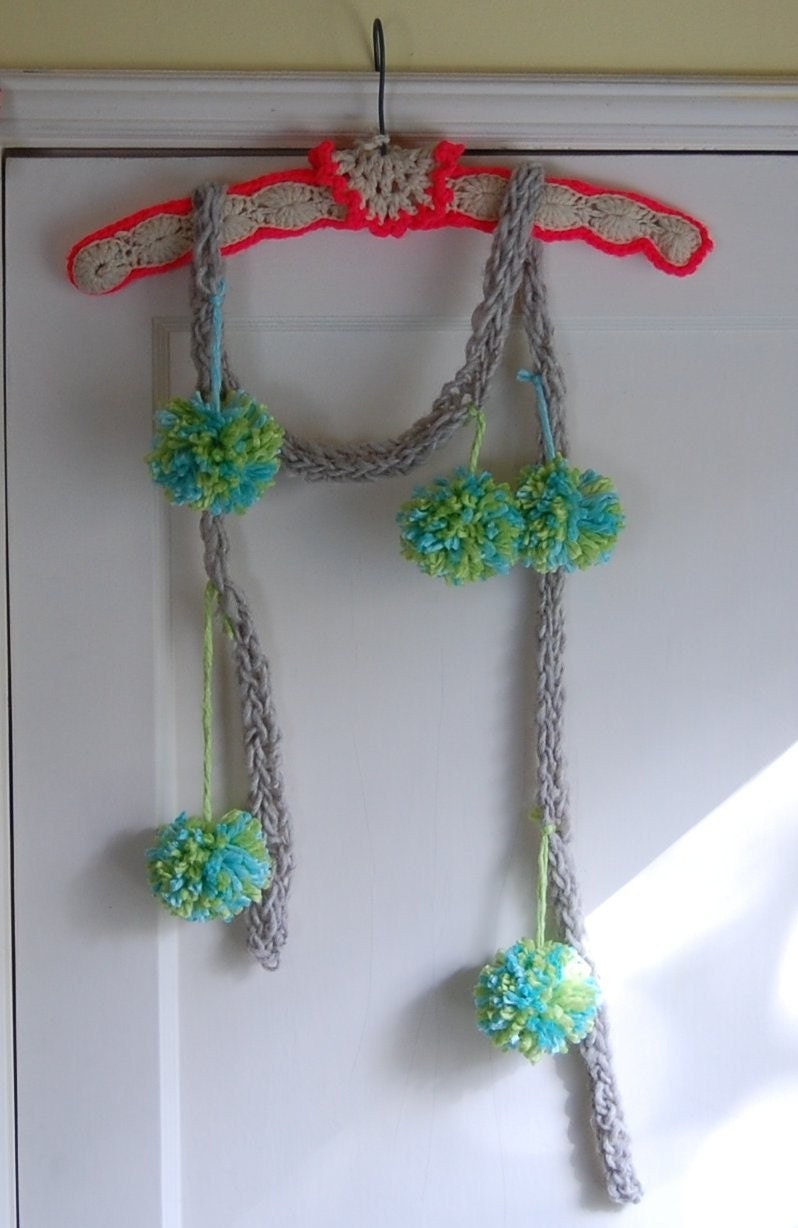
 Like this cute decorative idea from Elsie

A necklace, a headband or a bracelet like I did.


Or this one that I can't find its source
I can't wait to see what you'll make!
